Primary resources
used to plan for this hike:
Training
I knew I needed to step up the intensity of my training for this trip.
I had done a good job getting ready for the Rae Lakes Loop trip the
previous year, and took my learnings and applied them to my training
routine.
If you are considering whether you can do this hike, or any strenous
hike, getting in decent shape is important.
I thought the "mountain" I needed to climb to get back in shape was
higher than any mountain in the Sierra Nevada. An impassable peak. A
mountain with no trail or pass to navigate through.
It is NOT! It is achievable.
When I started training in 2009, I started from
"couch potato king", where climbing a single flight of stairs would get
my heart pumping and wind me. So I started training slowly, and added to
the intensity as the weeks went by. And each week, I noticed improvement. And yes, I had a physical and
discussed my plans with my doctor.

To adjust my training for this trip, I decreased the time spent
running, and increased
the time climbing stairs. I was totally fine last year as far as cardio
endurance went, but my thighs were struggling with the steep climb.
Every Sunday I did fully loaded 10 mile
hikes in the hilliest area I could find in FLAT Minnesota.
I did stairs several times a week, and worked up to wearing a 30 LB
weight belt while doing the stairs.
Finally, I did a 30 mile, 3
day trip on the Superior Hiking Trail a couple of weeks before heading
off on my JMT trip, and adjusted my pack contents and shoes based on
the experience.
2
years ago, 6-8 mile days were all I could do before hitting the "wall".
After training this year, I found that I was able to do 10 mile days
with a full pack, and still enjoy the "journey", so I
planned an average of 10 miles per day for this trip. Somewhat sedate
by some
thru hiker standards, but it worked great for me. I wanted enough time
each day to stop for pictures, enjoy the views, or sit on a rock and
reflect if I felt like it.
By the time I left for California, I was physically ready!
Food
I tried some different ideas this trip with my food.
I made some of my own meals, and used some ready made meals from Pack-It
Gourment.
No freezedried on this trip. I was trying to get lighter volume, better
taste, and the most calories per ounce that I could.
I purchased the Freezer Bag Cooking book by Sarah Kirkconnell, and
most
of my meals were either FBC (Freezer Bag Cooking) meals or wraps.
Tortillas fit just
perfectly in the bottom of a bear can! I recommend either her book or
her web site Trail
Cooking.com for FBC tips and recipes.
I experimented with different recipes and tried them both on and off
the trail during the year. Some were good, some were not so good! I
found that I am not a fan of curry, and had made several meals with
curry as a base.
I dehydrated asian noodles and different types of beans, and I used
beans,
couscous and rice as the base for
most of the meals. I also added meat and spice products from
PackItGourmet.
Overall, I was happy with how it all turned out, but will make some
adjustments for next year.
Gear
I tweaked and tweaked my pack until my base weight was 16.7 LBS and
totally loaded weight was 28.2 LBS. (I'm still trying to figure out why
my total weight came in at 29 LBS at the scale at Yosemite
Wilderness Center! Where did that extra weight come from???
Click
here for my gear list for this trip.
Changes made to my gear choices for
this trip:
Tent
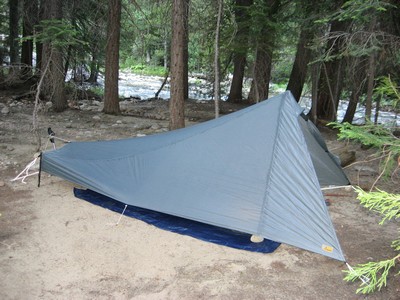
I used a new Tarptent for this trip. Last year I had tried the Tarptent
Contrail, and was generally happy with the tent, however I really
like
a freestanding tent. If I need to move my tent for any reason, moving a
tent that has 6-8 stakes and is supported by hiking poles (and those
stakes I just mentioned) means starting over from scratch.
Why would I move my tent???
It seems I do this often... Camp is all setup, and the wind starts. I
want to angle the tent differently in the wind. Or I lay down, and
realize my head is downhill. Or I missed a big bump sticking into my
back.
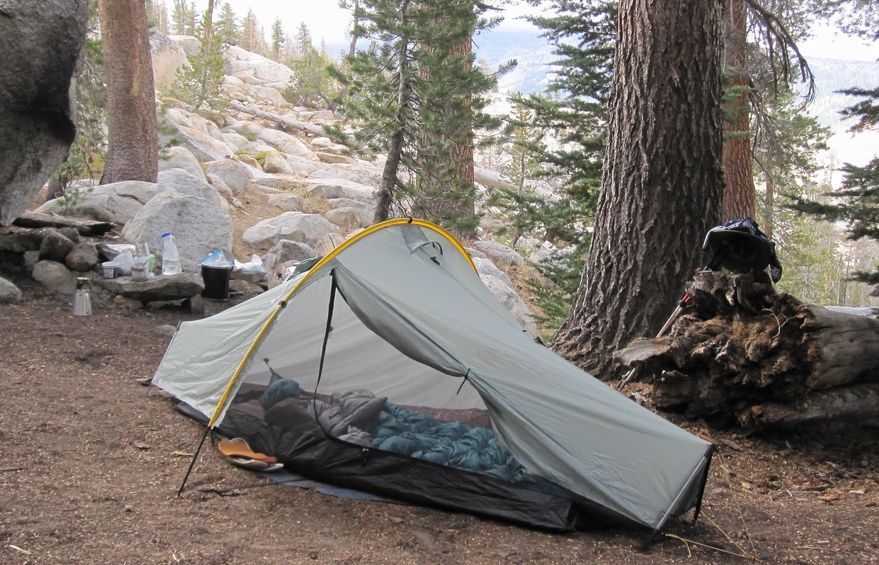
So this year, I switched to the Tarptent
Moment. It DOES have a
freestanding option, and I purchased the optional center pole so I
could have a truly freestanding, lightweight, single wall tent.
However... I found the setup (and moving, if needed) so easy with the 2
stake setup that I chose not to bring the center pole on this trip.
Good decision.
The Moment tarptent had a good workout on this trip. Light rain, light
snow, below freezing temps with light wind... Nothing too drastic, but
certainly not a warm summer picnic either. I was very pleased with the
Moment. A little heavier than my Contrail, but overall I found the
features of the Moment were well worth the added 4 oz.
Moment Pros:
- Side entry
- Larger vestibule
- 2 stake setup (or freestanding)
- Headroom is in the center of the tent
- Faster setup, less 'fussing' to get a good pitch
Cons:
- A bit heavier (using less stakes offsets the 4 oz
difference a bit)
- 28.5 oz vs 24 oz for the Contrail
|
|
Tarptent Contrail in SEKI
|
Tarptent Moment on JMT
|
Lightweight boots instead of trail runners
I did most of my hiking in
2010 in trail runners. I did over 300 miles in them, and enjoyed the
light weight and comfort. However, during my 30 mile SHT hike just
before my JMT trip, I covered a lot of rocky and root covered ground.
My feet were so fatigued at the end of each day that I realized that I
needed the protection and support of a boot for rocky trails. I am VERY
glad I switched back to boots for this trip. I will still use trail
runners on most trips, but for the JMT, boots are my footwear of
choice.
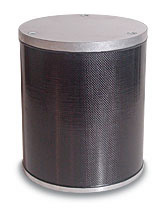
Bear can
I went ahead and purchased my own bear can this year. I hope to be
doing many trips in bear country, and decided I wanted the
lightest (approved) bear can. Since I don't carry a large pack, I chose
the Bearikade
Weekender.
I am able to fit the Weekender in my ULA Circuit backpack both
vertically and horizontally. It's a tight fit horizontally, and only
fits into the top of the pack, but this is how I prefer to carry the
can. I feel it rides better, and does not dig into my back like it does
when I carry it vertically.
You can see in the table below the comparison between the three major
alternatves on the market.
MODEL
|
WEIGHT
|
CUBIC IN
|
SIZE (dia x hgt)
|
Garcia
|
44 oz
|
614 c.u in
|
8.8" x 12"
|
Bear Vault BV500
|
41 oz
|
700 c.u in
|
8.7" x 12.7"
|
Bearikade Weekender
|
31 oz
|
650 c.u. in
|
9" x 10"
|
The Bearikade has comparable volume, while being smaller and
significantly lighter.
The 10+ oz weight savings in the Bearikade comes at a cost
though. The Weekender is by far the most expensive of the options. The
manufacturer, Wild Ideas, does rent the bear cans, and they have a
great deal for thru hikers (JMT, AT, PCT, etc.) See their web site for rental
details.
The Bearikade Weekender is only available from the manufacturer.
|
|
|
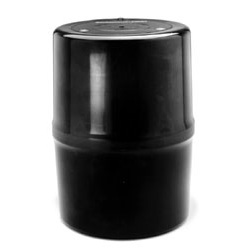
Garcia
|
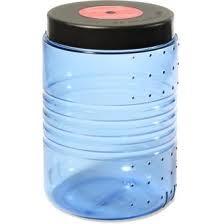
Bearvault BV500
|
Bearikade Weekender
|
Resupply
In
order to not have to carry anything extra for the entire 10 day trip, I
mailed resupply boxes to Tuolumne Meadows and Reds Meadow with extra
food, extra batteries, sunscreen, soap, etc.
Both resupply locations worked without a hitch.
I also did a drop box to VVR. Once I arrived in Yosemite, I packed up
everything I wasn't taking on the trail and mailed it to VVR so it
would be there when I ended my hike. Worked like a charm.
Instructions for resupply:
Tuolumne Meadows
Reds Meadow
Vermillion Valley Resort (VVR)
Permits
Since my decision to do a section of the JMT was made in early 2010, it
was too late to get much choice in my permit dates or starting
trailhead.
According to the permit availability information maintained on the
Yosemite Wilderness nps.gov
website, it looked like there was a spot or two open just after Labor
day. There were no openings at all for the Happy Isle thru hike,
(called "Happy Isles to Sunrise/Merced Lake pass-through") but it
looked like I could get a permit for Happy Isle to
Little Yosemite Valley. The permit only requires that you stay the
first night in the designated area. Any night after the first can be
spent anywhere in Yosemite. I faxed in my request, and the next day
received an email with confirmation that I was booked for a September
7th, 2010 start date! Since LYV is only about 5 miles from Happy Isle,
most
folks want to get more miles in that first day. I was fine with the low
miles for day 1. The climb out of Yosemite Valley is tough, and as it
turned out, I got a late start anyway so the low mileage day was
perfect.
Transportation
The logistics of getting to and from the trailheads, and resupply along
the trail require some thought and planning.
I chose to fly into Fresno, and use public
transportation to get
to Yosemite. For the return home, I saw that the owner of VVR now
offers a shuttle from VVR to Fresno, and after discussing the option
with Jim (the owner) I decided to go ahead and use the service. It isn't
cheap, but it is reasonable considering it takes his driver most of a
full day to do the roundtrip.
Getting to
Yosemite:
- Flight from Minnepolis to Fresno
- Stay at La Quinta in Fresno (not a great hotel, but
walking distance to
Amtrak)
- Amtrak Train from Fresno to Merced
- YARTS bus
from Merced to Yosemite
Getting
back home:
- VVR shuttle from VVR to Fresno Airport (Thanks Jim
and my driver,
Olive)
- Flight from Fresno to MN
|


